Calendar
The RP Management System Calendar feature enables users to view system activities and track office/personal events. View and manage the Calendar through the RP Management - Calendar (Figure 47a).
System Activities are automatically posted on the calendar based on dates configured in the system.
| • | Workorder Completion Due Dates are automatically added to the calendar. |
Company/Personal Events must be added to the calendar manually.
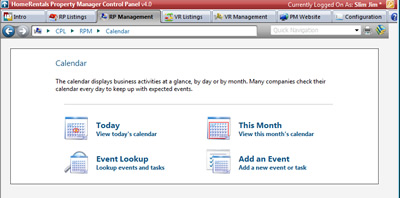
Figure 47a
To Add an Event to the Calendar:
1. Go to RP Management - Calendar - Add an Event or to RP Management - Office - Add an Event (Figure 47b).
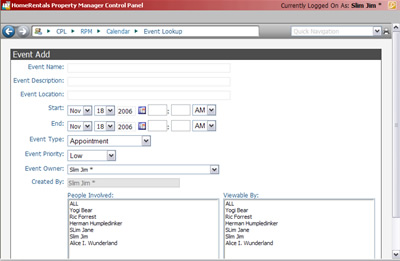
Figure 47b
2. Enter the Event details (Figure 47b)
Event Name - Enter an event a label that can be used to locate it on the calendar.
Event Description - Enter a more detailed description of the event to help differentiate it from other similar events.
Event Location - Enter address, room number, or other location information.
Start/End Date and Times - The Event will be added to the Calendar based the information.
Event Type - Select event type from drop down select list. The Event type will be displayed when hovering over the event icon on the calendar.
Event Priority - Assign Low, Medium, High, or Emergency priority to the event.
Event Owner - Select the person responsible for coordinating and overseeing the event. This person is authorized to edit the event details and can always view the event.
Created By - Event creator is automatically configured based on the Control Panel user ID used to access the system when the event is added. This person is authorized to make changes to event details and can always view the event. The "Created By" field is not editable.
People Involved - Select the people that are expected to participate in the event. The "people involved" cannot edit event details unless they are also the event owner or creator.
-Select ALL to designate all current and future HomeRentals.net system users as participants.
-Select multiple individual users by holding down the CTRL key when clicking on their names.
Viewable By - Select the people that need to be able to look up the event or view it on the calendar. Event viewers cannot edit event details unless they are also the event owner or creator.
-Select ALL to designate all current and future HomeRentals.net system users as participants.
-Select multiple individual users by holding down the CTRL key when clicking on their names.
3. Click Save Event to add it to the calendar.
View and manage existing Calendar Events through RP Management - Calendar - Event Lookup or RP Management - Office - Event Lookup. The event creator and owner can edit the event details, other authorized users are only able to view them.
Office Documents
Store internal property management company documents online so that system users can easily access them from any location. This feature can be used to store blank company forms, company policy/procedure documents, and company historical documents.
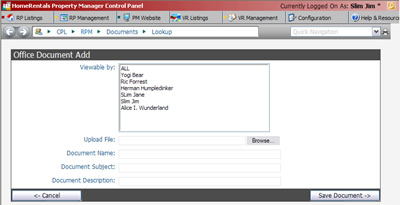
Figure 47c
To add an Office Document:
1. Go to RP Management - Office - Add a Document
2. Assign viewing permissions (Figure 47c):
Viewable By - Select the people that need to be able to look up and view the office document.
-Select ALL to designate all current and future HomeRentals.net system users as participants.
-Select multiple individual users by holding down the CTRL key when clicking on their names.
3. Browse the computer for a document and then double-click on it to select it for upload. The user may need to select "All Files" from the "Files of Type" select list. Make sure that the document's filename does not contain any special symbols characters (#, $, %, etc.). System Users will not be able to open files with special symbols and characters in the filename - the link will be corrupted.
4. The system automatically assigns the Document Name based on the document's filename, but the user can change this before saving. Assign a Subject and Description so that users can quickly locate and identify the document.
5. Click on Save Document to complete the upload process. The upload time depends on file size and Internet connection speed.
Search for office documents through RP Management - Office- Lookup a Document. System users may only access the office documents that they have been authorized to view.